All posts by Webmaster

Engine’s Water-Injected Exhaust Elbow

Engine’s Water-Injected Exhaust Elbow
Warren Elliott
November, 2007
Hull #: C380 # 44

Cooling sea water flows through our engine’s heat exchanger, then through the anti-siphon valve discussed above and to the elbow fitting at the aft end of the exhaust manifold. Here the water is “injected” into the hot exhaust gases, where it cools them while transiting the exhaust system, ending up back in the sea.

This elbow fitting is therefore in a very harsh environment, suffering the rigors of both very hot gases and warm/ hot salt water. [Fresh water sailors have an advantage here.] So you can imagine that this part is likely to be on the earlier, rather than later, timescale for failure. This occurred to at least one captain, albeit in a benign fashion. Over a period of months, his engine gradually exhibited higher and higher operating temperatures. After checking all the likely sources of

You need to be logged in to see the rest of this content.  Catalina380-IA members, please login.

To join please fill out a membership application (Association->Membership Application) and send a check to the address on the form.

Inexpensive SSB Antenna

Inexpensive SSB Antenna
Bob Bierly
August, 2007
Hull #: C380 #255

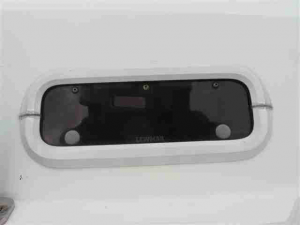
“I constructed a separate insulated antenna that runs from one of my my davit arms to the mast head using a spare halyard. I made this antenna from number 10 steel wire (from West ) and 2 porcelain insulators from a ham radio store. That proprietor recommended the longest possible wire as an antenna, which I have. I also avoided cutting the backstay and the expensive insulators for that purpose. Once the metal long wire is up you merely attach the insulated antenna lead  from the antenna tuner directly to the steel wire with a hose clamp or a copper u-bolt ( which I found in Home Depot). My total cost is maybe 20 bucks.” –Bob Bierly, C380 #255, “C’Mon Wind”

Bob’s antenna is certainly simple, and should perform well at least in some circumstances. However, as much of

You need to be logged in to see the rest of this content.  Catalina380-IA members, please login.

To join please fill out a membership application (Association->Membership Application) and send a check to the address on the form.
More on Portlight Leaks

More on Portlight Leaks
Richard Herbst
August, 2007
Hull #: C380 #93

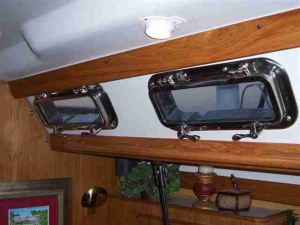
Last month’s [May 07] article on repairing portlight leaks omitted one source of a leak that is very easy to fix. On my boat (C380, S/N 93), the 2-horizontal seams in the Lewmar portlight’s frame is a primary source of leakage and the fix is really simple. My boat had been in the Gulf area for many years with the result that sunlight beat these seams to death. To fix, just run a bead of sealant across each seam and the leak stops (see photo).

Note that the portlight frame is hollow, so after sealing the seams, you may have to take a brisk sail to heel and spill the residual water out of the already present holes in the lower part of the frame. Before starting, put a towel there to catch the water.[Suggest removing trim ring;

You need to be logged in to see the rest of this content.  Catalina380-IA members, please login.

To join please fill out a membership application (Association->Membership Application) and send a check to the address on the form.
Portlight Replacement

Port light Replacement
Don and Linda Rooker
May, 2007
Hull #: C380 #157

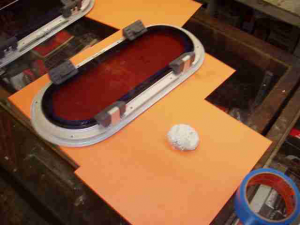
Don and Linda Rooker, who sail “Jolly Mon”, in the Pickwick Lake/ Tennessee River region of North East Mississippi, felt that the crazing on their original portlghts was too much and decided to go for stainless-steel framed units. So, thought I’d insert their photo here, as a different approach [See Photo]. As their new portlights, made by New Found Metal [.com], have tempered glass, no more crazing. Most of the fleet, including Admiral Jeanne and I, continue to shy away from glass on board. Perhaps a few have wine glasses carefully stowed?? But tempered glass is pretty strong.

You need to be logged in to see the rest of this content.  Catalina380-IA members, please login.

To join please fill out a membership application (Association->Membership Application) and send a check to the address on the form.
Portlights- Resealing & Reinstalling

Portlights- Resealing & Reinstalling
Rick Ranno
May, 2007
Hull #: C-380 # 297

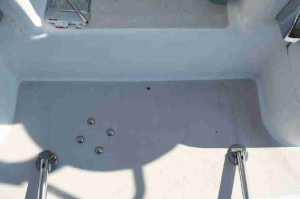
After a few years with my C380 [#297], the portlights developed some water leaks. Most were not obvious as to cause. So, after deciding to “dig in”, the first thing I did was to determine that the portlight was leaking and that a dirty or bad window gasket was not the cause. To do this, I removed the plastic trim rings with a screwdriver and applied some powder around the suspected areas. After several days including some rain, drip lines in the powder made it obvious that most leaks were entering via the window-tohull seal or, in this case, lack of seal. The best, long-term way to beat this one is complete portlight removal and re-installation.

First, with the trim ring removed, remove the 10/32 Philips mounting screws. Use a heat gun to help loosen the seal

You need to be logged in to see the rest of this content.  Catalina380-IA members, please login.

To join please fill out a membership application (Association->Membership Application) and send a check to the address on the form.

SSB Radio Installation

SSB Radio Installation
Steve Dublin
August, 2007
Hull #: C380 #84

Editor’s Introduction– As I spent many of my younger years as an active radio amateur [ham] and virtually all of my work life in antenna & microwave engineering, I feel some degree of justification for the comments you’ll see sprinkled throughout the article below [apologies to author: Steve Dublin]; I hope they’re helpful– that’s the intent!

One general comment by way of clarifying some terms. The two popular versions of transceivers used by sailors are “Marine” and “Ham” types; they are both capable of SSB transmissions. Their functional distinction is principally that of frequency of operation. Marine SSB units are limited to certain frequencies as dictated by the FCC.

Ham units were limited to other frequencies, called Ham bands, but newer Ham transceivers are capable of operation on both marine and Ham frequencies, so there’s a distinct advantage for

You need to be logged in to see the rest of this content.  Catalina380-IA members, please login.

To join please fill out a membership application (Association->Membership Application) and send a check to the address on the form.

Swim Platform Drain

Swim Platform Drain
Warren Elliott
5/24/07
Hull #: C380 #44

Install Instructions

1- Decide on approx placement of drain tube. Note from photo that location depends on how/where autopilot is installed. For those with no autopilot, locate drain tube in center [port/stb] and as close to vertical step as possible [but be aware of size of your electric drill]. Mine is about 7/8″ aft of “riser”.


2- Autopilot drive mechanism is usually installed offset, so you will want to have drain tube on opposite side in order to be as close to center as possible

3- Release wheel [so that rudder is easy to turn from below], and climb down into lazarette on the side opposite autopilot. Look over area, noting existing cockpit drain hose[s], and where you’ll cut into one and insert T for platform drain. Note also how autopilot mechanism moves laterally as rudder is turned. Find

You need to be logged in to see the rest of this content.  Catalina380-IA members, please login.

To join please fill out a membership application (Association->Membership Application) and send a check to the address on the form.

Waste System Mods

Waste System Mods
Mike Kenny/Bob Goldman/Steve Krazinski

November, 2007
Hull #: C380 # 77/243/102

Following are probably the best methods towards eliminating unpleasant head odors from our C380-390’s. [Note that C387’s have a completely different waste system, one that uses only the new “odor-safe” hose, so most of the following does not apply.]

The basic approach here is to eliminate the older black hose and install rigid PVC piping wherever waste is continually present and doing so is practical. PVC is considered non-permeable so, properly installed, there should be zero odor from it. Alternatively, where not practical, installation of the relatively new “odor-safe” or “noodor” hose is the approach of choice. With regard to the tank egress plumbing, the only part which is continually in contact with waste is the main tank-output line, so this is the primary candidate for upgrading to PVC. Replacing other hoses with PVC or with

You need to be logged in to see the rest of this content.  Catalina380-IA members, please login.

To join please fill out a membership application (Association->Membership Application) and send a check to the address on the form.

Winter Covers

Winter Covers
Richard Herbst & Warren Elliott

August, 2006 Hull #: 93 & 44

I know August is a bit too warm to think about this subject, but think about my perspective. It’s now June and quite warm here in southern NY, and I’ve just returned from many months in the warm Bahamas and southeastern U.S., so I really don’t have winter even vaguely in mind. But, duty calls! And when you read this, cold weather won’t be far behind, at least in northern climes.

This article was submitted by Richard Herbst, a C380 captain from N.J., where winters are real. This is for those looking for inexpensive protection for that prized sailboat.

Why Cover Your Boat?

In many areas, winter weather causes water to cyclically freeze/ expand and melt/contract.. Over time, this can lift and destroy various parts, including tabbing that holds bulkheads to the hull. The rate of

You need to be logged in to see the rest of this content.  Catalina380-IA members, please login.

To join please fill out a membership application (Association->Membership Application) and send a check to the address on the form.

Is Tachometer Accurate?

Is Tachometer Accurate?
Richard Herbst

Date: November, 2006 Hull #: 93

I recently suspected that my helm’s tach was inaccurate. After investigating, I found as much as 1300 RPM error near the high end! The tachometer’s input signal comes from an upgraded alternator on my Westerbeke 42B engine, a Balmar model 91-100. So, if there’s an upgraded alternator in use, you could have a big tachometer error.

I found the error by using a $65.00 digital “Diesel Tiny Tach” from Design Technology Inc (www.tinytach.com) which claims an accuracy of +/- 10 RPM. My order included a longer cable [$10, + about $7 shipping], which allows the indicator to reach the helm. The Tiny Tach is powered by a 9-volt battery; its transducer clamps onto an injector’s fuel line, measuring the pulses of injected fuel to determine RPM. The unit can be set up permanently or connected when needed. I used

You need to be logged in to see the rest of this content.  Catalina380-IA members, please login.

To join please fill out a membership application (Association->Membership Application) and send a check to the address on the form.