I need to replace a cockpit table leaf brace on our 387, as the cord broke. Searched our group and found conversation on replacement part for 380. Found it at ugly fish company which distributes for southco.com called a “click stay” for $44.30 each. Can anyone tell me if they used the same size/part on both 380 and 387? Want to be sure to order the right part. and at this price don’t want to get it wrong.
Natalie Speicher
No Fear
387 hull #3
Thank you all for the information on the cockpit table leaf supports. Found them in three places. Ugly fish: $44.30 ea. Catalina Yachts: $41.50 and Catalina Direct, part #Z2664 for $26.83. Will try the repair $1.00 fix first, but good to have a back up.
Natalie Speicher
S/V No Fear C387 #3
I’ve actually repaired the struts on Rhythm’s cockpit table. Remove.the bracket and you’ll see one end unscrews. Remove that
You need to be logged in to see the rest of this content. Catalina380-IA members, please login.
To join please fill out a membership application (Association->Membership Application) and send a check to the address on the form.
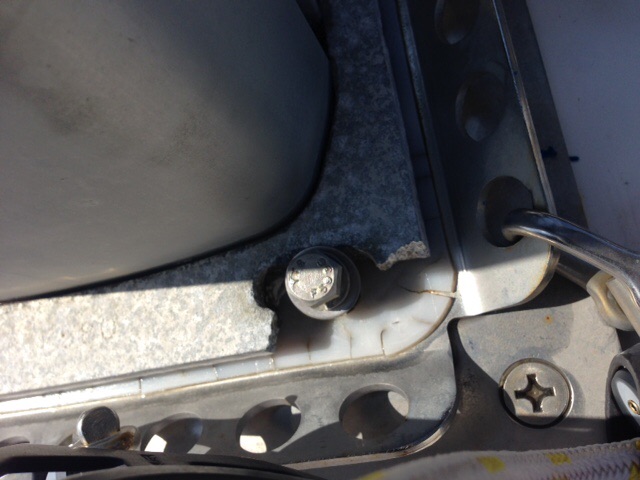
My 2006, 387 hull #106 has developed. a concerning problem with the cast alloy sparcraft mast step secures the base of the mast to the deck. The mast step is secured to the deck via 4 corner bolts and in my case the casting has fractured in 2 of the corners so now only secured via 2 bolts with the remainder no longer effective.
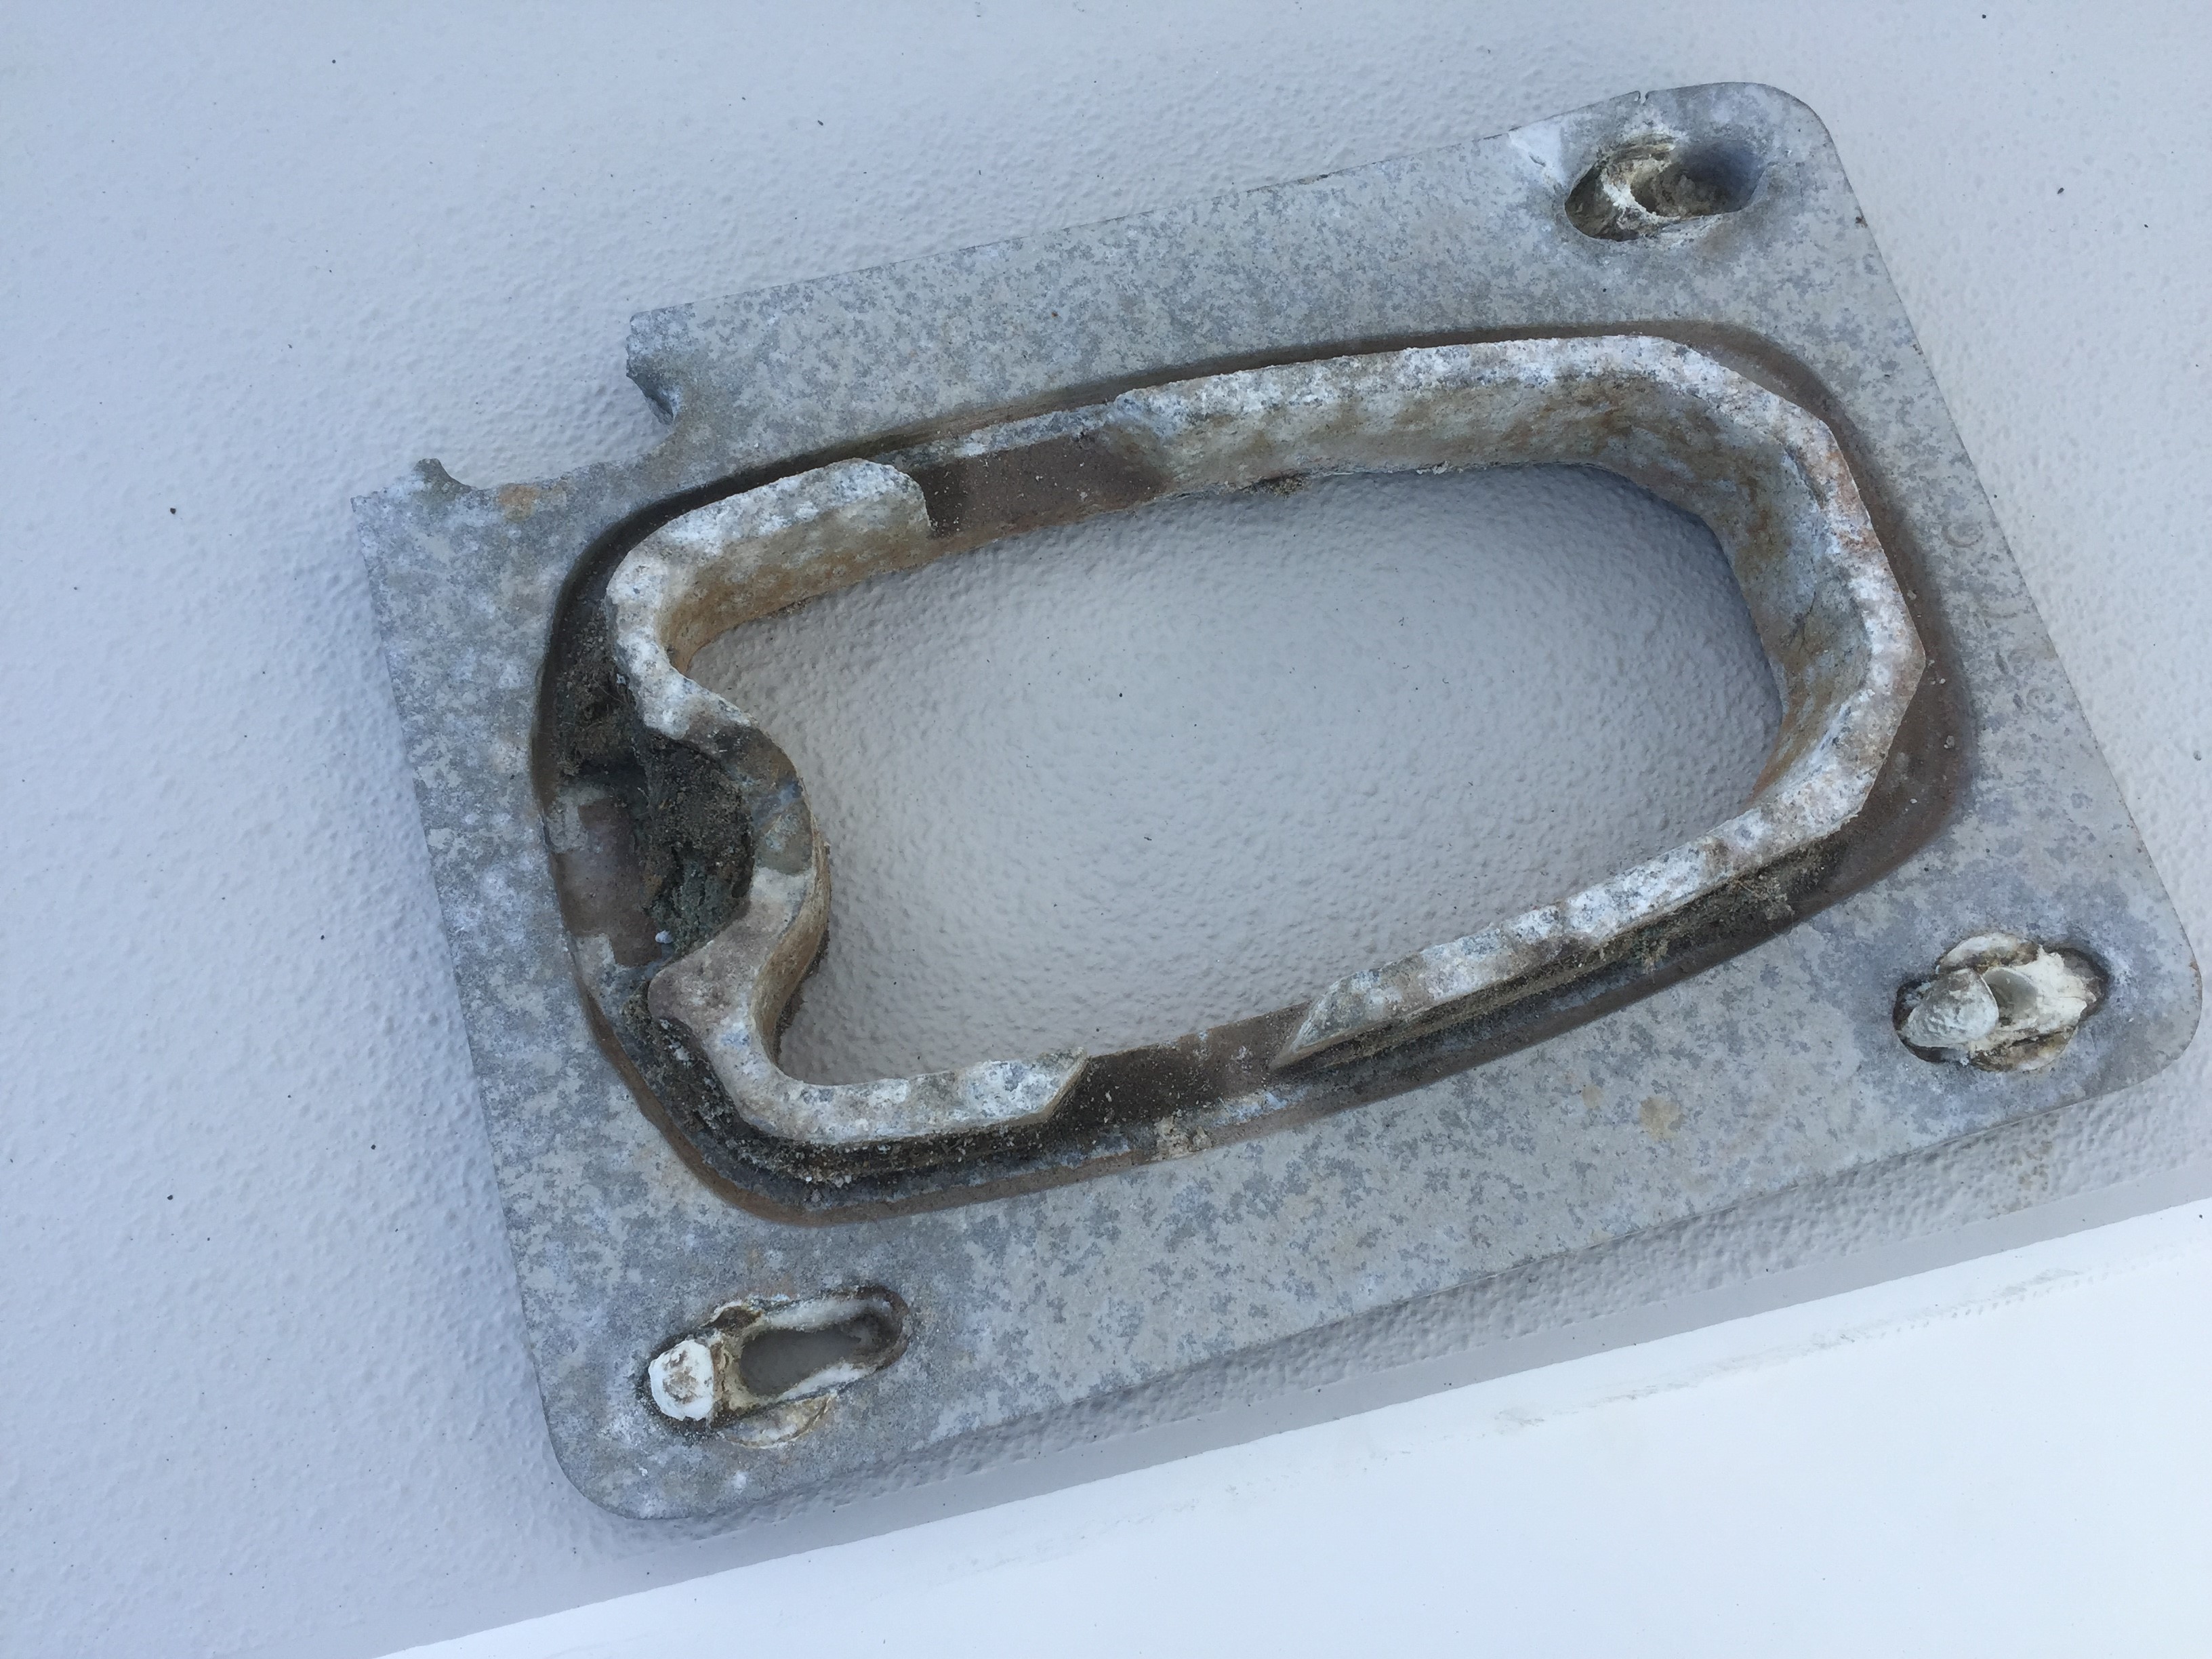
After sourcing the replacement part #FM-580 from Sparcraft France, next steps were to secure a rigger to undertake the work and prepare for the day to ensure the riggers costs were minimised. In our case we elected to jack the mast manually to avoid significant cost blowouts the use of a crane can trigger.
Preparation tasks:
Source some 2 mm high-density polyethylene plastic sheet, trace a template of the mast step with a marker, cutting this using scissors seemed to work best, this is required to
You need to be logged in to see the rest of this content. Catalina380-IA members, please login.
To join please fill out a membership application (Association->Membership Application) and send a check to the address on the form.
I am in the process of replacing the forward water tank vent in my 200 Catalina 380…After some research, including input/advice from the group; I did the following:
Installed a 10 “ circular inspection port on the starboard side of the anchor locker;
Replaced broken vent with a new perko 5/8” vent with 90 degree bend (where vent pipe attached to vent hose).
I looked into a plastic forespar vent but they did not come with a bend on the inside of the hull…I was concerned abut a kink in the water tank vent hose after connecting with the vent. The perko vent appeared to be an exact replacement for the broken vent.
Several captains have suggested the following sources for replacements of the stainless caps to the various tanks. Most of the sources below require you to buy the whole fitting. Defender sells just the cap. To me, the chains are dangerous and just beg to have the cap go over the side. JMO.
This source sells just the cap without the rest of the unit:
My terminal strip is not numbered so I call pin/ terminal #1 = green/ black wires (adjacent is heavy red wires). Color a/ color b denotes color on engine side / color on panel side. ( this is for Westerbekes; Yanmars should be the same functionally, but colors on engine side may be different. Westerbekes see P 48/49 of engine manual)
-12 v / ground. Green/ black
+12 v Battery Red/red
Temperature sender. Yellow / brown
Tach sender. Brown / grey
Glow plugs. Violet / white
Not used. Orange / not used (Oil pressure gauge option)
Alt./ ignition. Red white / purple. (see term. 9)
Starter. White / yellow red
Alarm power. Pink / not used (tied to 7)
Not used. Grey / not used ( charge light option)
Oil pres switch. Lt. Blue / Lt. Blue black
Water temp switch. Tan / tan black
To complete on cockpit
You need to be logged in to see the rest of this content. Catalina380-IA members, please login.
To join please fill out a membership application (Association->Membership Application) and send a check to the address on the form.
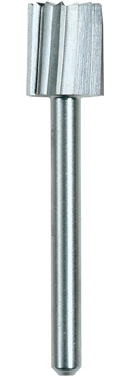
I had a leak in my front hatch last year. Mine was leaking under the frame and not from the gasket. Luckily the core was dry since it was dripping down between the frame and inside trim piece. The PO has removed the frame and put some silicone between the trim piece and coring. An extra 1hr of work he could of sealed the core for good. So I recommend coring out all around the hatch and not just the screw holes with epoxy or resin. I found this dremel cutting tool very helpful. Run the shaft along the fiberglass using it as kind jig. It will cut out about an 1/8″ just enough to seal the core.
Taping a sheet of plastic on the inside will catch the coring and drips from the epoxy. Also it would be a good time to paint the inside trim piece, I found
You need to be logged in to see the rest of this content. Catalina380-IA members, please login.
To join please fill out a membership application (Association->Membership Application) and send a check to the address on the form.
We had troubling leaks with our forward hatch leaked as well. Gaskets or bedding are generally the source. After addressing the gasket issues, it still leaked, with water leaking out of the inner hatch trim strip. I repeatedly tried Capt Tolley’s Creaping Crack Cure, as was suggested, but it didn’t work.. Finally I broke down and pulled the hatch. I found that the screws Catalina used to install the hatch were too short, which caused quite a bit of flexing along the hinge line. The flexing was great enough to cause the fiberglass skin to de-laminate from the deck core. Catalina also didn’t seal the hatch mounting holes with epoxy to isolate the deck core from leaks, luckily the core was in good shape. I ended up drilling holes, injecting epoxy, and c-clamping the de-lamination to repair it. Finally re-bedded the hatch using longer 1 /1/2″ screws and Sikaflex 291
You need to be logged in to see the rest of this content. Catalina380-IA members, please login.
To join please fill out a membership application (Association->Membership Application) and send a check to the address on the form.
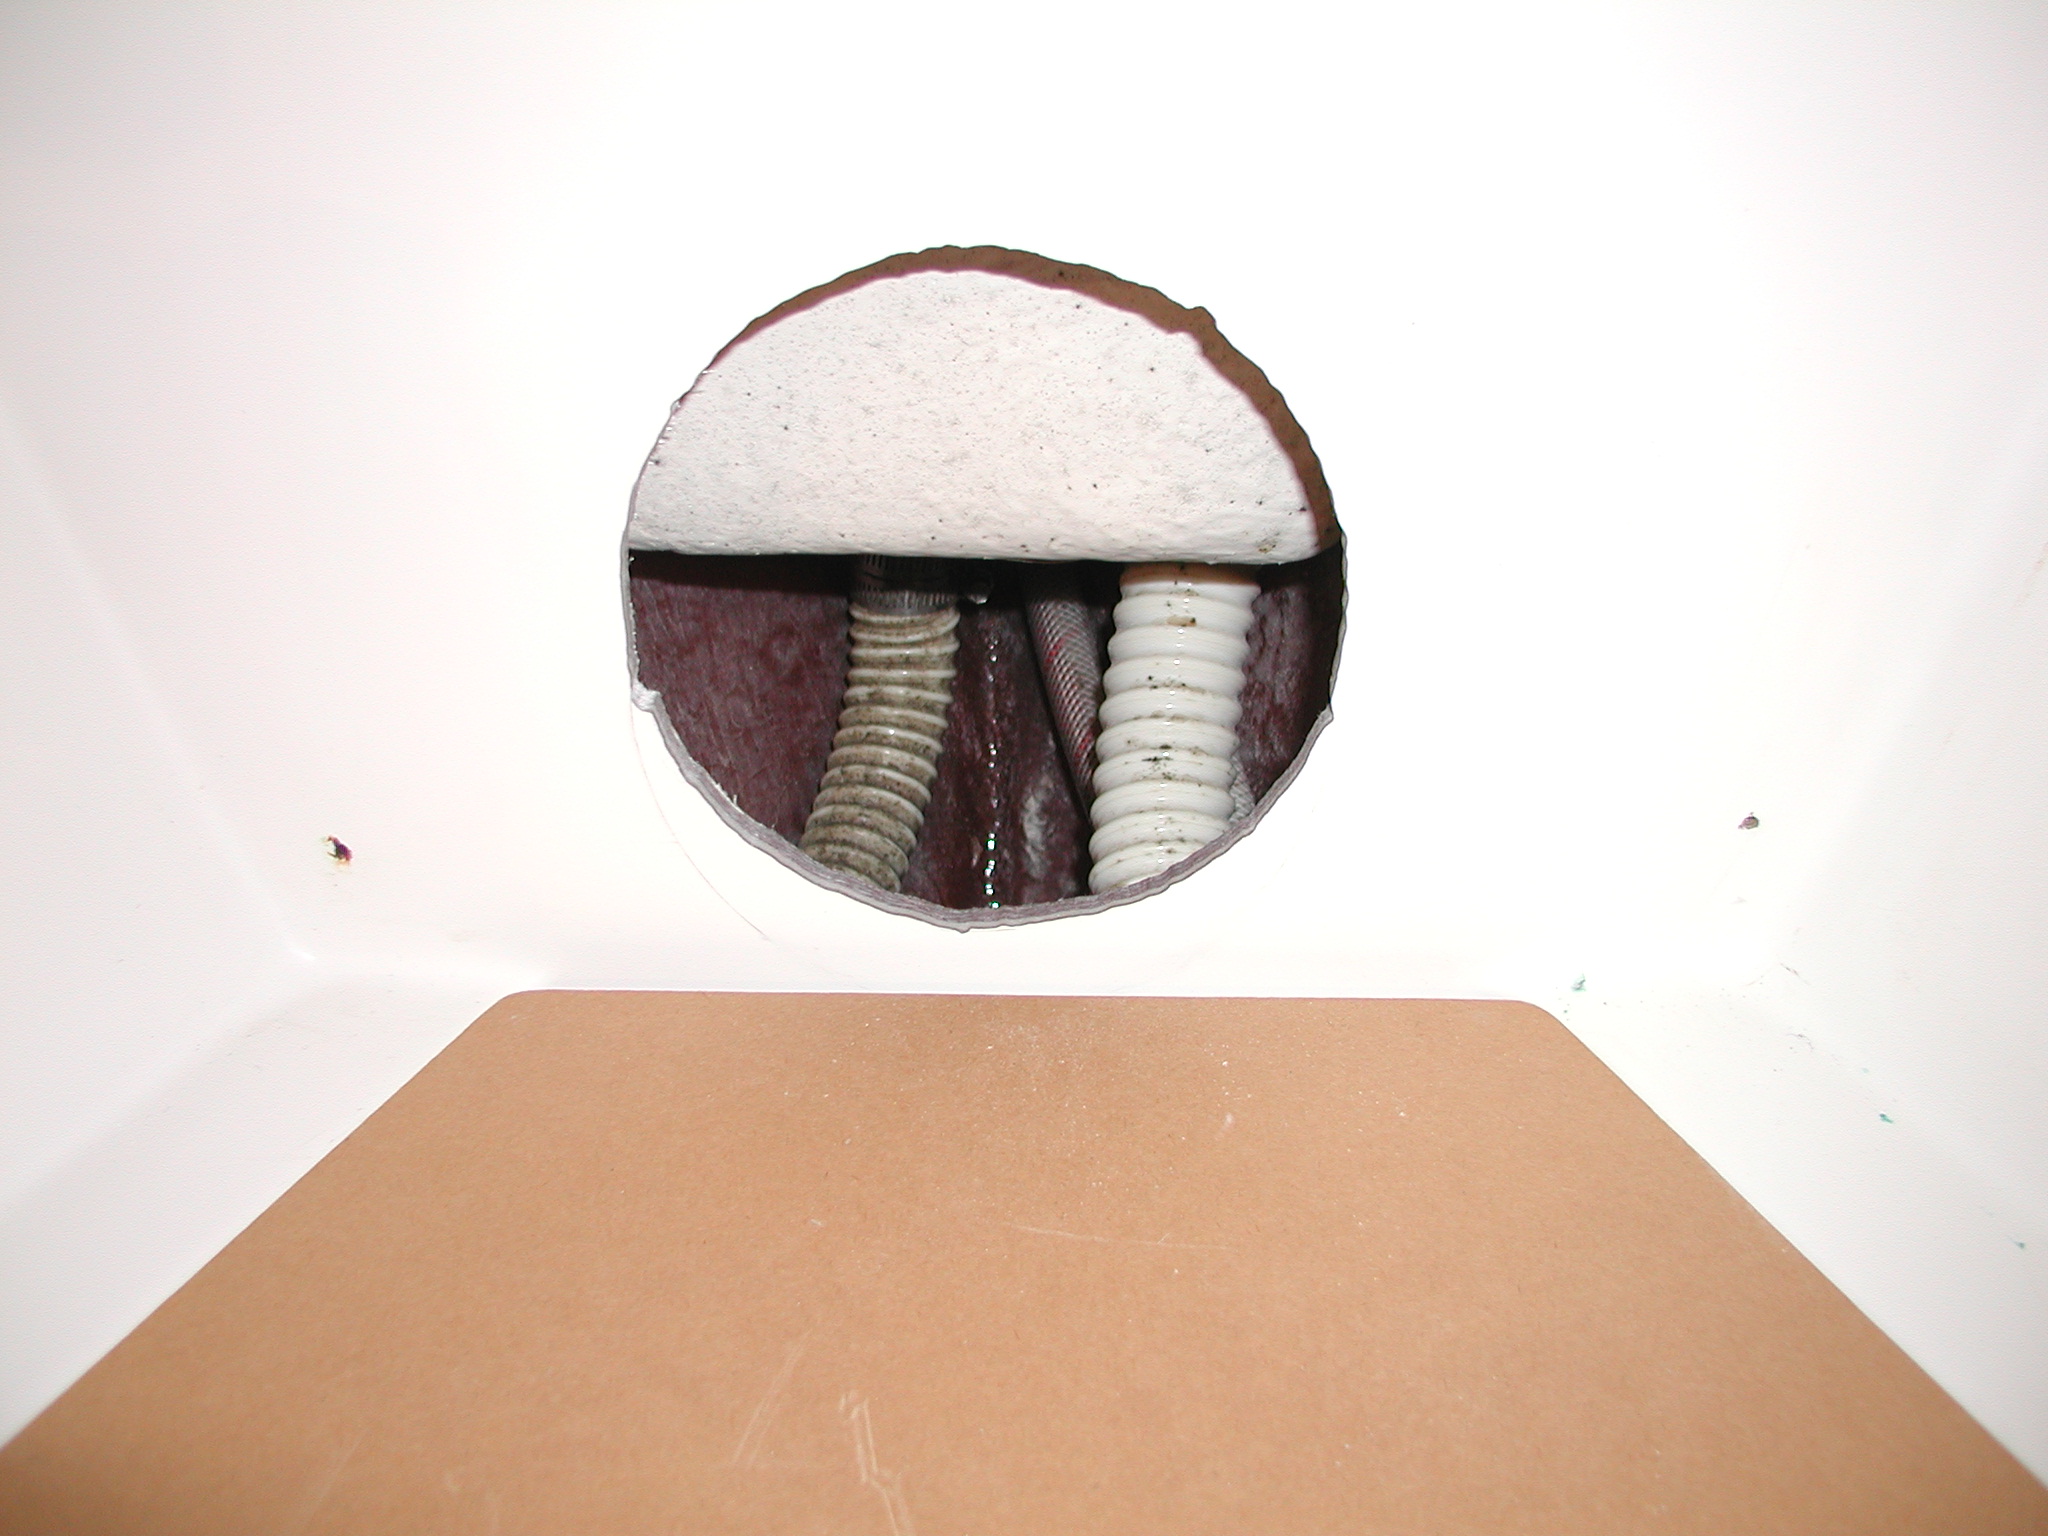
The attached picture shows one way to access the anchor well hose. I didn’t actually replace the hose because when I got in there I could tell that it wasn’t the culprit. I had the Admiral run the hose in the well while I felt for leaks at both ends of the hose. I don’t think the hose is reachable without an access hole. I could have replaced the hose through this access hole. The hole looks kind of raw in this picture but I finished it by putting a six inch deck plate in it and covering it with the teak plywood panel.
Paul McManus
Sea Sea Rider C380 #185
You need to be logged in to see the rest of this content. Catalina380-IA members, please login.
To join please fill out a membership application (Association->Membership Application) and send a check to the address on the form.
We have a mini 1200watt heater from west marine. We have used it for a few years mostly on the starboard circuit. We put it on the port circuit this past weekend and it caused a fire on the white wire going to the block on the starboard wall behind the breaker panel. The end of the wire that was on the block burnt clear through. This line came from the shore power breaker and went directly to the wall panel. The wire was a 12awg but the main breaker is 30 amp. The breaker does have two connections…so I was wondering if it breaks down the amps into two 15 amp lines? If not then the wiring is undersized! 30 amp should be on 10awg.
I replaced the burnt wire with a 10awg and tightened all of the other connections as well. The breaker never tripped… The only two
You need to be logged in to see the rest of this content. Catalina380-IA members, please login.
To join please fill out a membership application (Association->Membership Application) and send a check to the address on the form.
40511 for the rear. They are virtually the same spec other than the rears are designed for a bit more weight. This is for the Westerbeke 42b four with a Hurth transmission.
Westerbeke’s original part number for the 42b is 36341 however Catalina had different mounts spec’d for this motor in our boats. I managed to get a pn off one of the original ones and dealt with the wb dealer here in Ontario. The 40510/40511 were originally used on the 35b Westerbeke.
Westerbeke shows no stock if you plug the number in on WB main website but according to my guy they have 25 currently in stock and it is a stocked item.
I decided to stay with OEM parts as they lasted this long and easier to swap out with the same re measurements height etc. About $180 piece
Paul
C380 hull 170
You need to be logged in to see the rest of this content. Catalina380-IA members, please login.
To join please fill out a membership application (Association->Membership Application) and send a check to the address on the form.