I had an interesting conversation with a friend and 320 owner about standing rigging inspection and replacement. We began by him suggesting it was time to replace the lifelines on his 2001 320. We moved to the standing rigging after he told me that the person he spoke to at Catalina told him they recommend replacement every five years. He contacted the current provider of the rigging and they recommended every 10 years.
My question is; how long is too long to have the rigging replaced? Our boats are in So Cal, and in the water all year.
Wes
Spring Fever
C387 #53 (2004)
Marina Del Rey, Ca
Wes
Interesting topic. I’ve heard from several not necessarily definitive sources that rigging in the Puget Sound area tends to last longer due to our rainy climate that continually cleans it. Most people up here are pretty comfortable with 20 year old
You need to be logged in to see the rest of this content. Catalina380-IA members, please login.
To join please fill out a membership application (Association->Membership Application) and send a check to the address on the form.
[Editor: Also see post of refrigerator door replacement.]
We appear to be getting a lot of condensation from the main forward facing fridge door. It is the original door and as far as I can tell the original door seal. I did the dollar bill test and it seems as if there is not a lot of drag on numerous spots around the seal. Has anyone replaced the seal on the door before? If so was it successful? And where would you get a new seal? I have seen in the photos that some have upgraded the complete door assy with the stainless steel version. Is this a better option long term and a successful fix? Is the door exchange/replacement a perfect swap or what is involved in that project?
Thanks,
Paul
Hull 170
Maybe I should take some pictures when I am at the boat this weekend. I added
You need to be logged in to see the rest of this content. Catalina380-IA members, please login.
To join please fill out a membership application (Association->Membership Application) and send a check to the address on the form.
I have also been fighting the refrigerator door. It has to be defrosted weekly. The gasket material had been replaced by previous owners with weather-stripping. The hinge side gasket gets pushed off when you close the door, our door is warped from latching down at the top left corner with a noticeable gap around lower right corner. I was looking at a screw down hatch latch for the lower corner and decided to order the stainless steel door with commercial latch from Catalina. (I passed it off as a birthday present for my wife…she LOVED it) It is a special production part based on your hull number and was ordered JUST LAST WEEK! I can’t wait to get it. Cost is $505 plus shipping (Gulp) but over the next 10 years or so there is no doubt we will appreciate it.
John
C-380 #105
Lucky Star
Factory Supplied Fridge Door
You need to be logged in to see the rest of this content. Catalina380-IA members, please login.
To join please fill out a membership application (Association->Membership Application) and send a check to the address on the form.
You have probably seen the ads in Boat US magazine and other boating pubs for Affordable Hardtops and listing a website www.hardtotop.com. The product shown on the site both in a photo gallery and in sketches is basically a bimini top (mostly for power boats) constructed of hard plastic translucent polycarbonate (2 ft by 8 ft ?) sheets fitted together fore and aft with a proprietary aluminum extrusion and attached to your preexisting SS or aluminum bows. The top is is sold as a kit for DYI or local fabrication. My question is simple. Has anyone here on Yahoo groups done one of these kits or have any experience with the company behind the ads? Having worn out two canvas biminis in 14 years this has some appeal. Comments?
Bob Bierly
CMON WIND #255
Bob;
The product looks very much like a product from the Architectural skylight industry that
You need to be logged in to see the rest of this content. Catalina380-IA members, please login.
To join please fill out a membership application (Association->Membership Application) and send a check to the address on the form.
Before you pull the old hose out (through the under sink cabinet) drill a hole in it and attach a line at the tank end. If the hose jams, you can pull it forward again to release it. Then attach the line to the new hose and use it as a guide, have someone pull gently while you push from under the sink. That way the new hose will not go where it wants, but rather where you are guiding it. Use enough new hose length so that you can cut off the few inches with the holes in it. Yes two holes so that you can arrange the leed line to be in the center of the hose. Some tape, creating a cone also helps to guide the hose.
Bob Xanadu
c380, #243
Might help to spray outside of new hose with silicone or Teflon. Warren
[Editor: This comes from a long-time C380 owner. The content should be of interest to members given the experience of Bob Bierly who sent it to the list serve.]
Folks,
As a “public service” to those few east coast sailors who may be looking to make that first big trip south, I pass along this semi commercial message from publishers of the best anchor and waterway guide publications I have found. (Barbara and Doug Leinhard on SV Melinda Kay might want to comment). The message says it all.
Bob Bierly
From: diana@semi-local.com To: bojabierly2@aol.com Sent: 9/1/2014 5:54:24 A.M. Eastern Daylight Time Subj: On the Water ChartGuides Update: ICW AnchorGuides SECOND EDITION Now Available
On the Water ChartGuides Update: ICW AnchorGuides SECOND EDITION Now Available
Hi Bob,
This summer we were thrilled when Practical Sailor magazine, the “Consumer Reports” of all things marine, awarded our Cruise Guide and Anchor Guide series
You need to be logged in to see the rest of this content. Catalina380-IA members, please login.
To join please fill out a membership application (Association->Membership Application) and send a check to the address on the form.
We’ve lost the transmission on our Catalina 387. It was supplied with a Yanmar 3JH4E engine. The Kanzaki model number is KM35A. Is anybody aware of the availability of re-built or used transmissions? I understand that a new transmission would come from Japan with a lead time of over 70 days.
We have an electric Head that uses raw water. Recently we have noticed that depending on the source of the raw water, ocean, river or creek, there is either no odor (open ocean) or a very strong odor (rivers or creeks). We are considering a conversion to fresh water for the Head. Has any other member encountered the same issue? If yes, what was done to solve the odor issue.
Sent from my iPad
Any comments / suggestions regarding the conversion are very much appreciated.
Thanks
Isi & LaMae
S/V Windseeker II
NJ
You need to be logged in to see the rest of this content. Catalina380-IA members, please login.
To join please fill out a membership application (Association->Membership Application) and send a check to the address on the form.
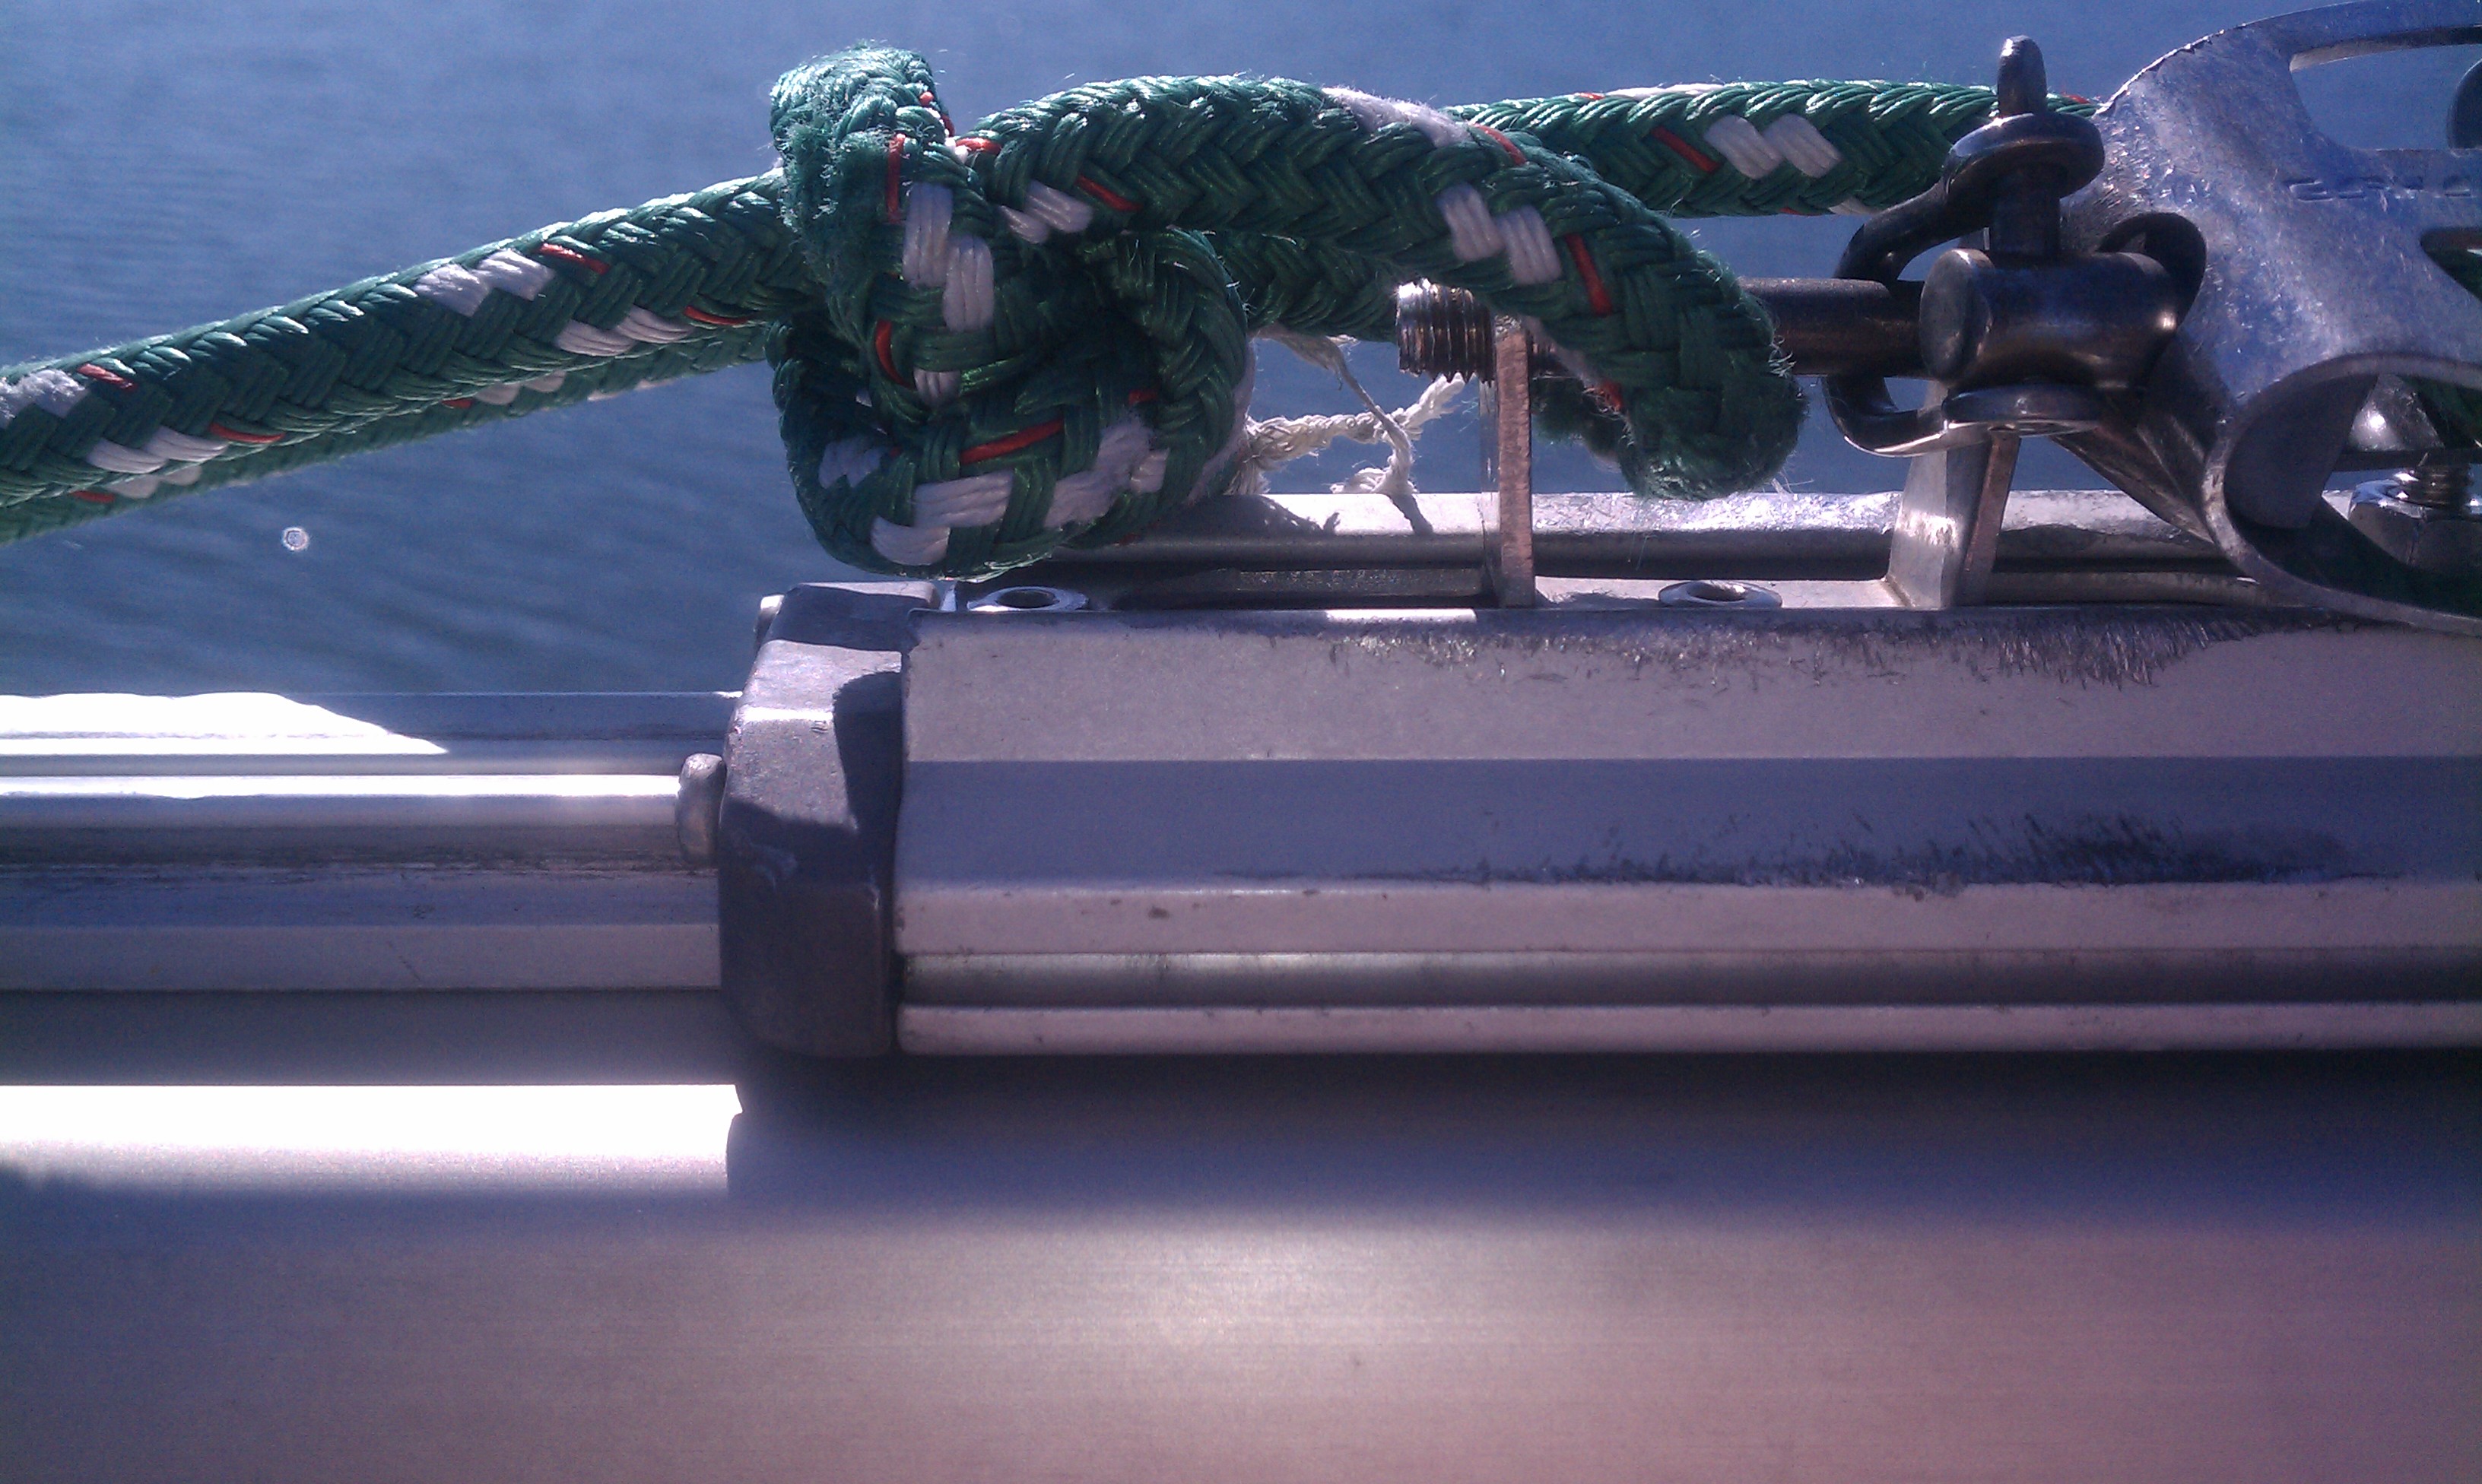
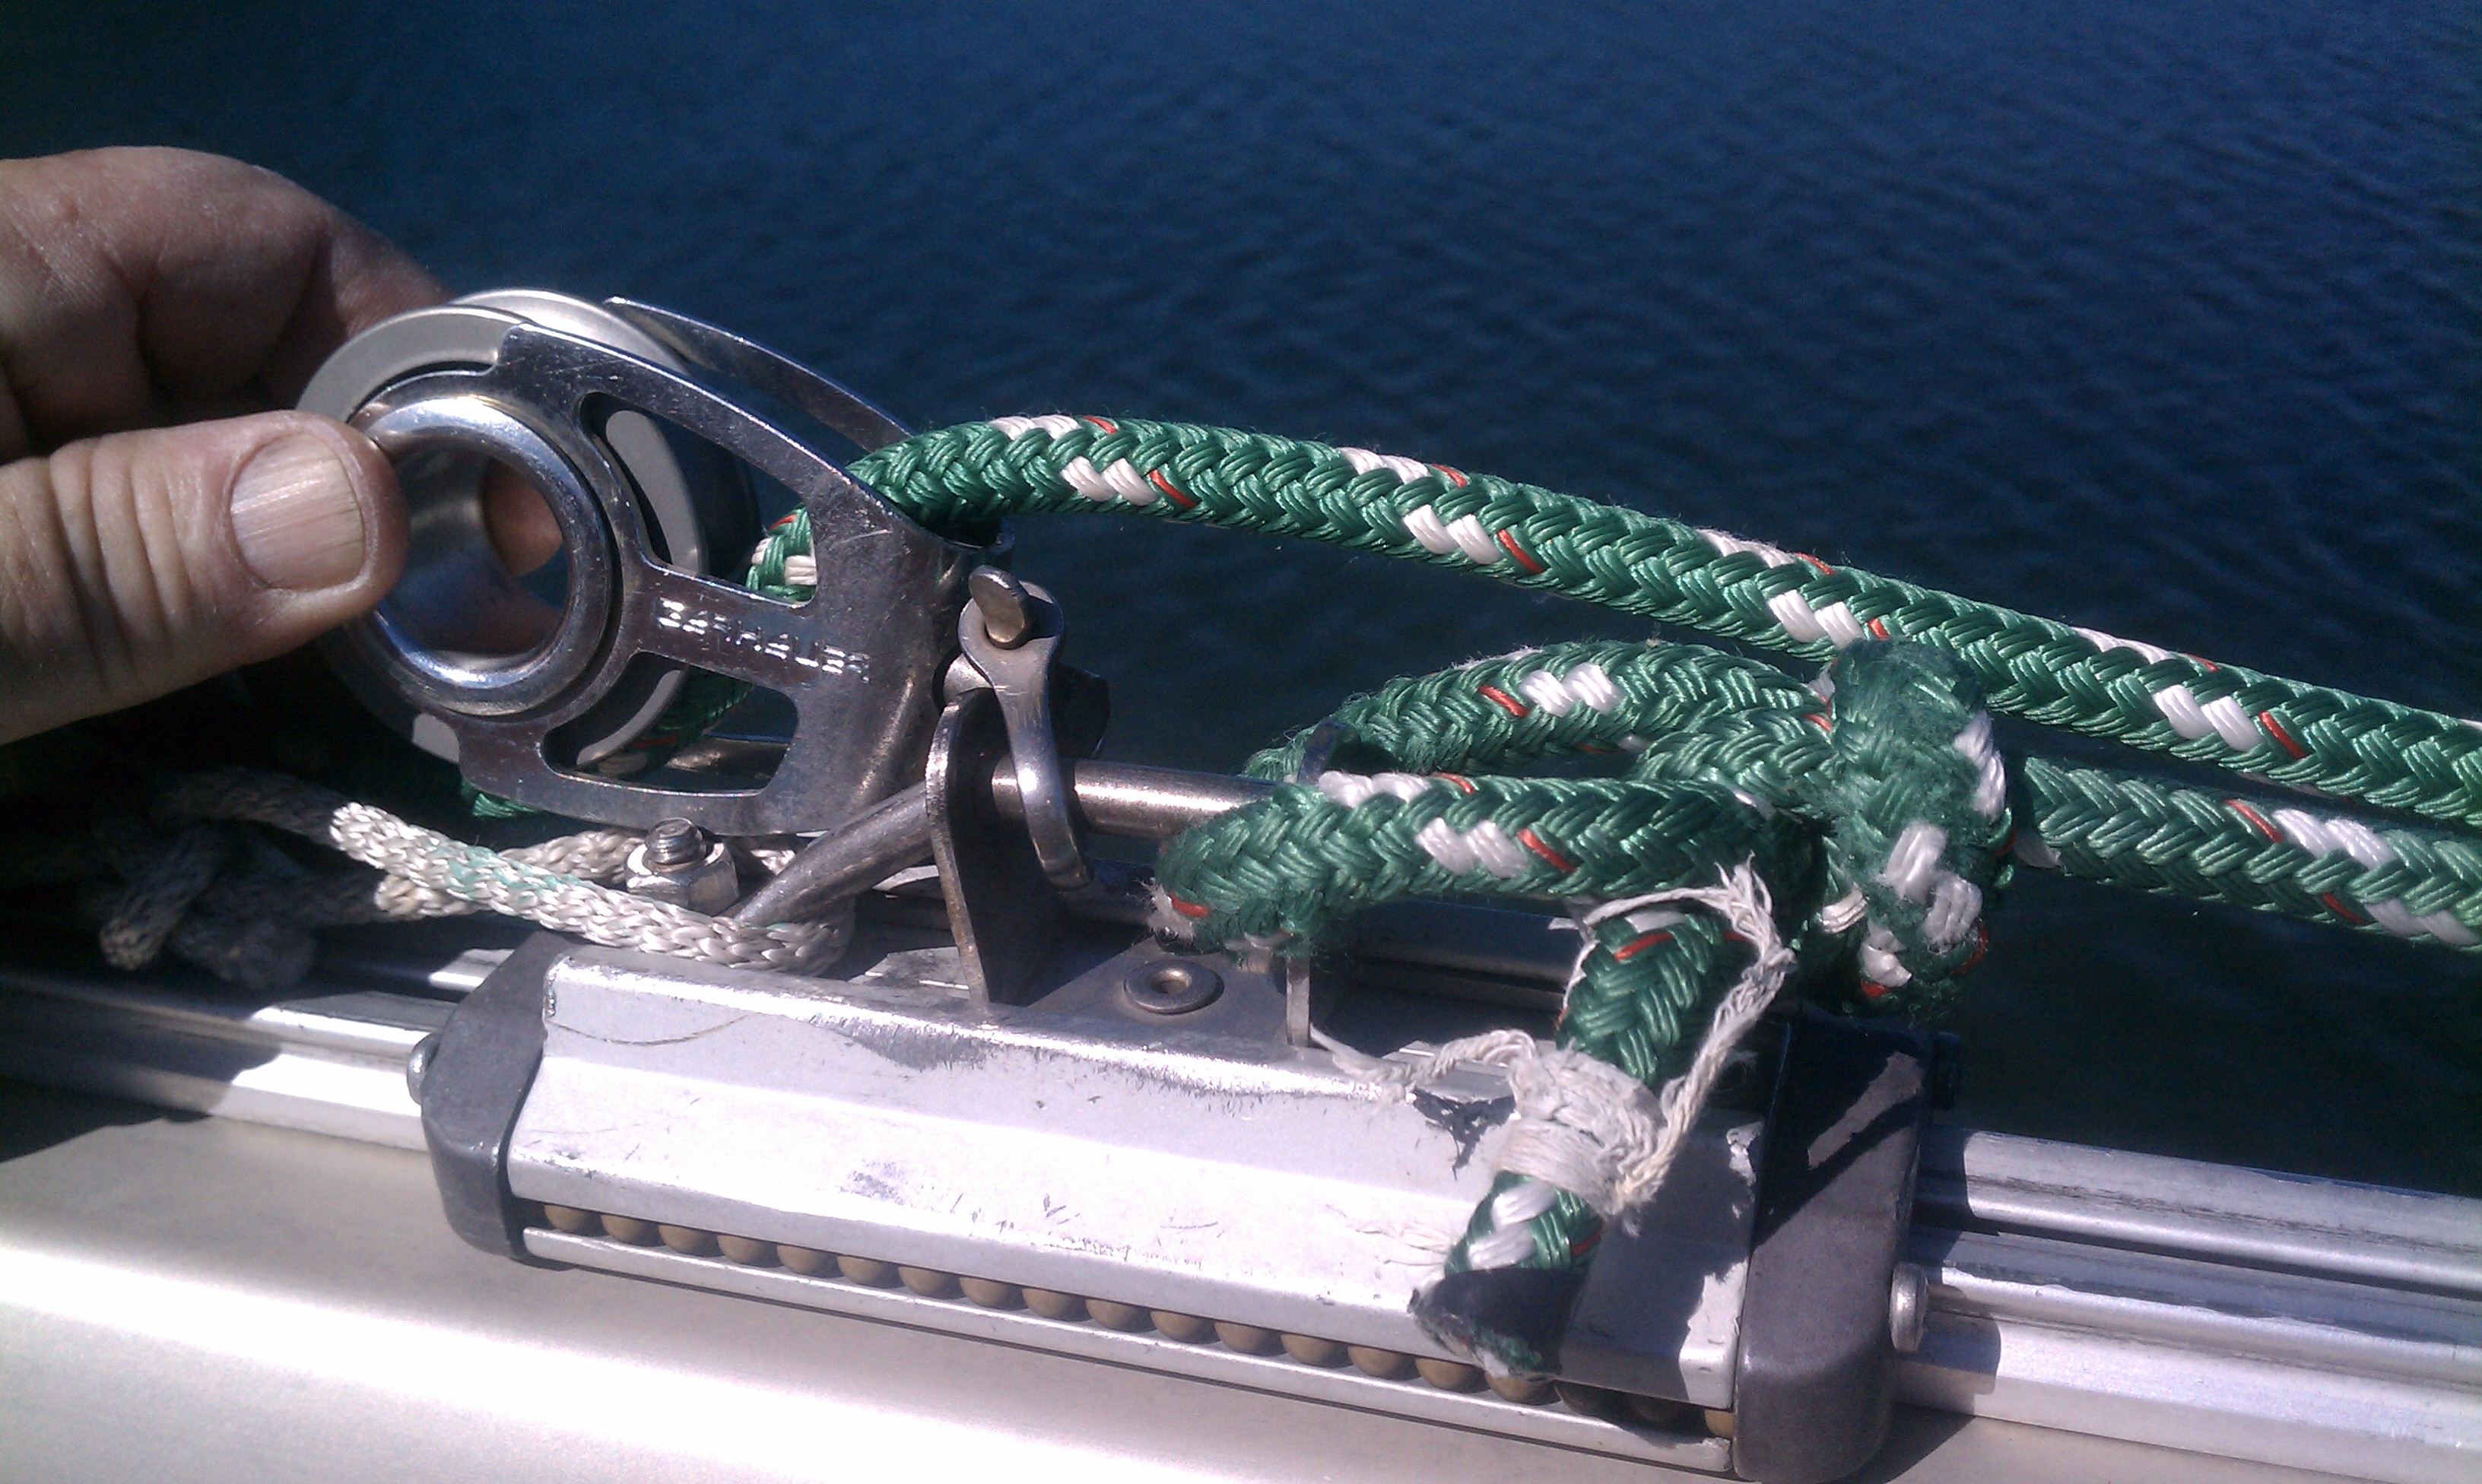
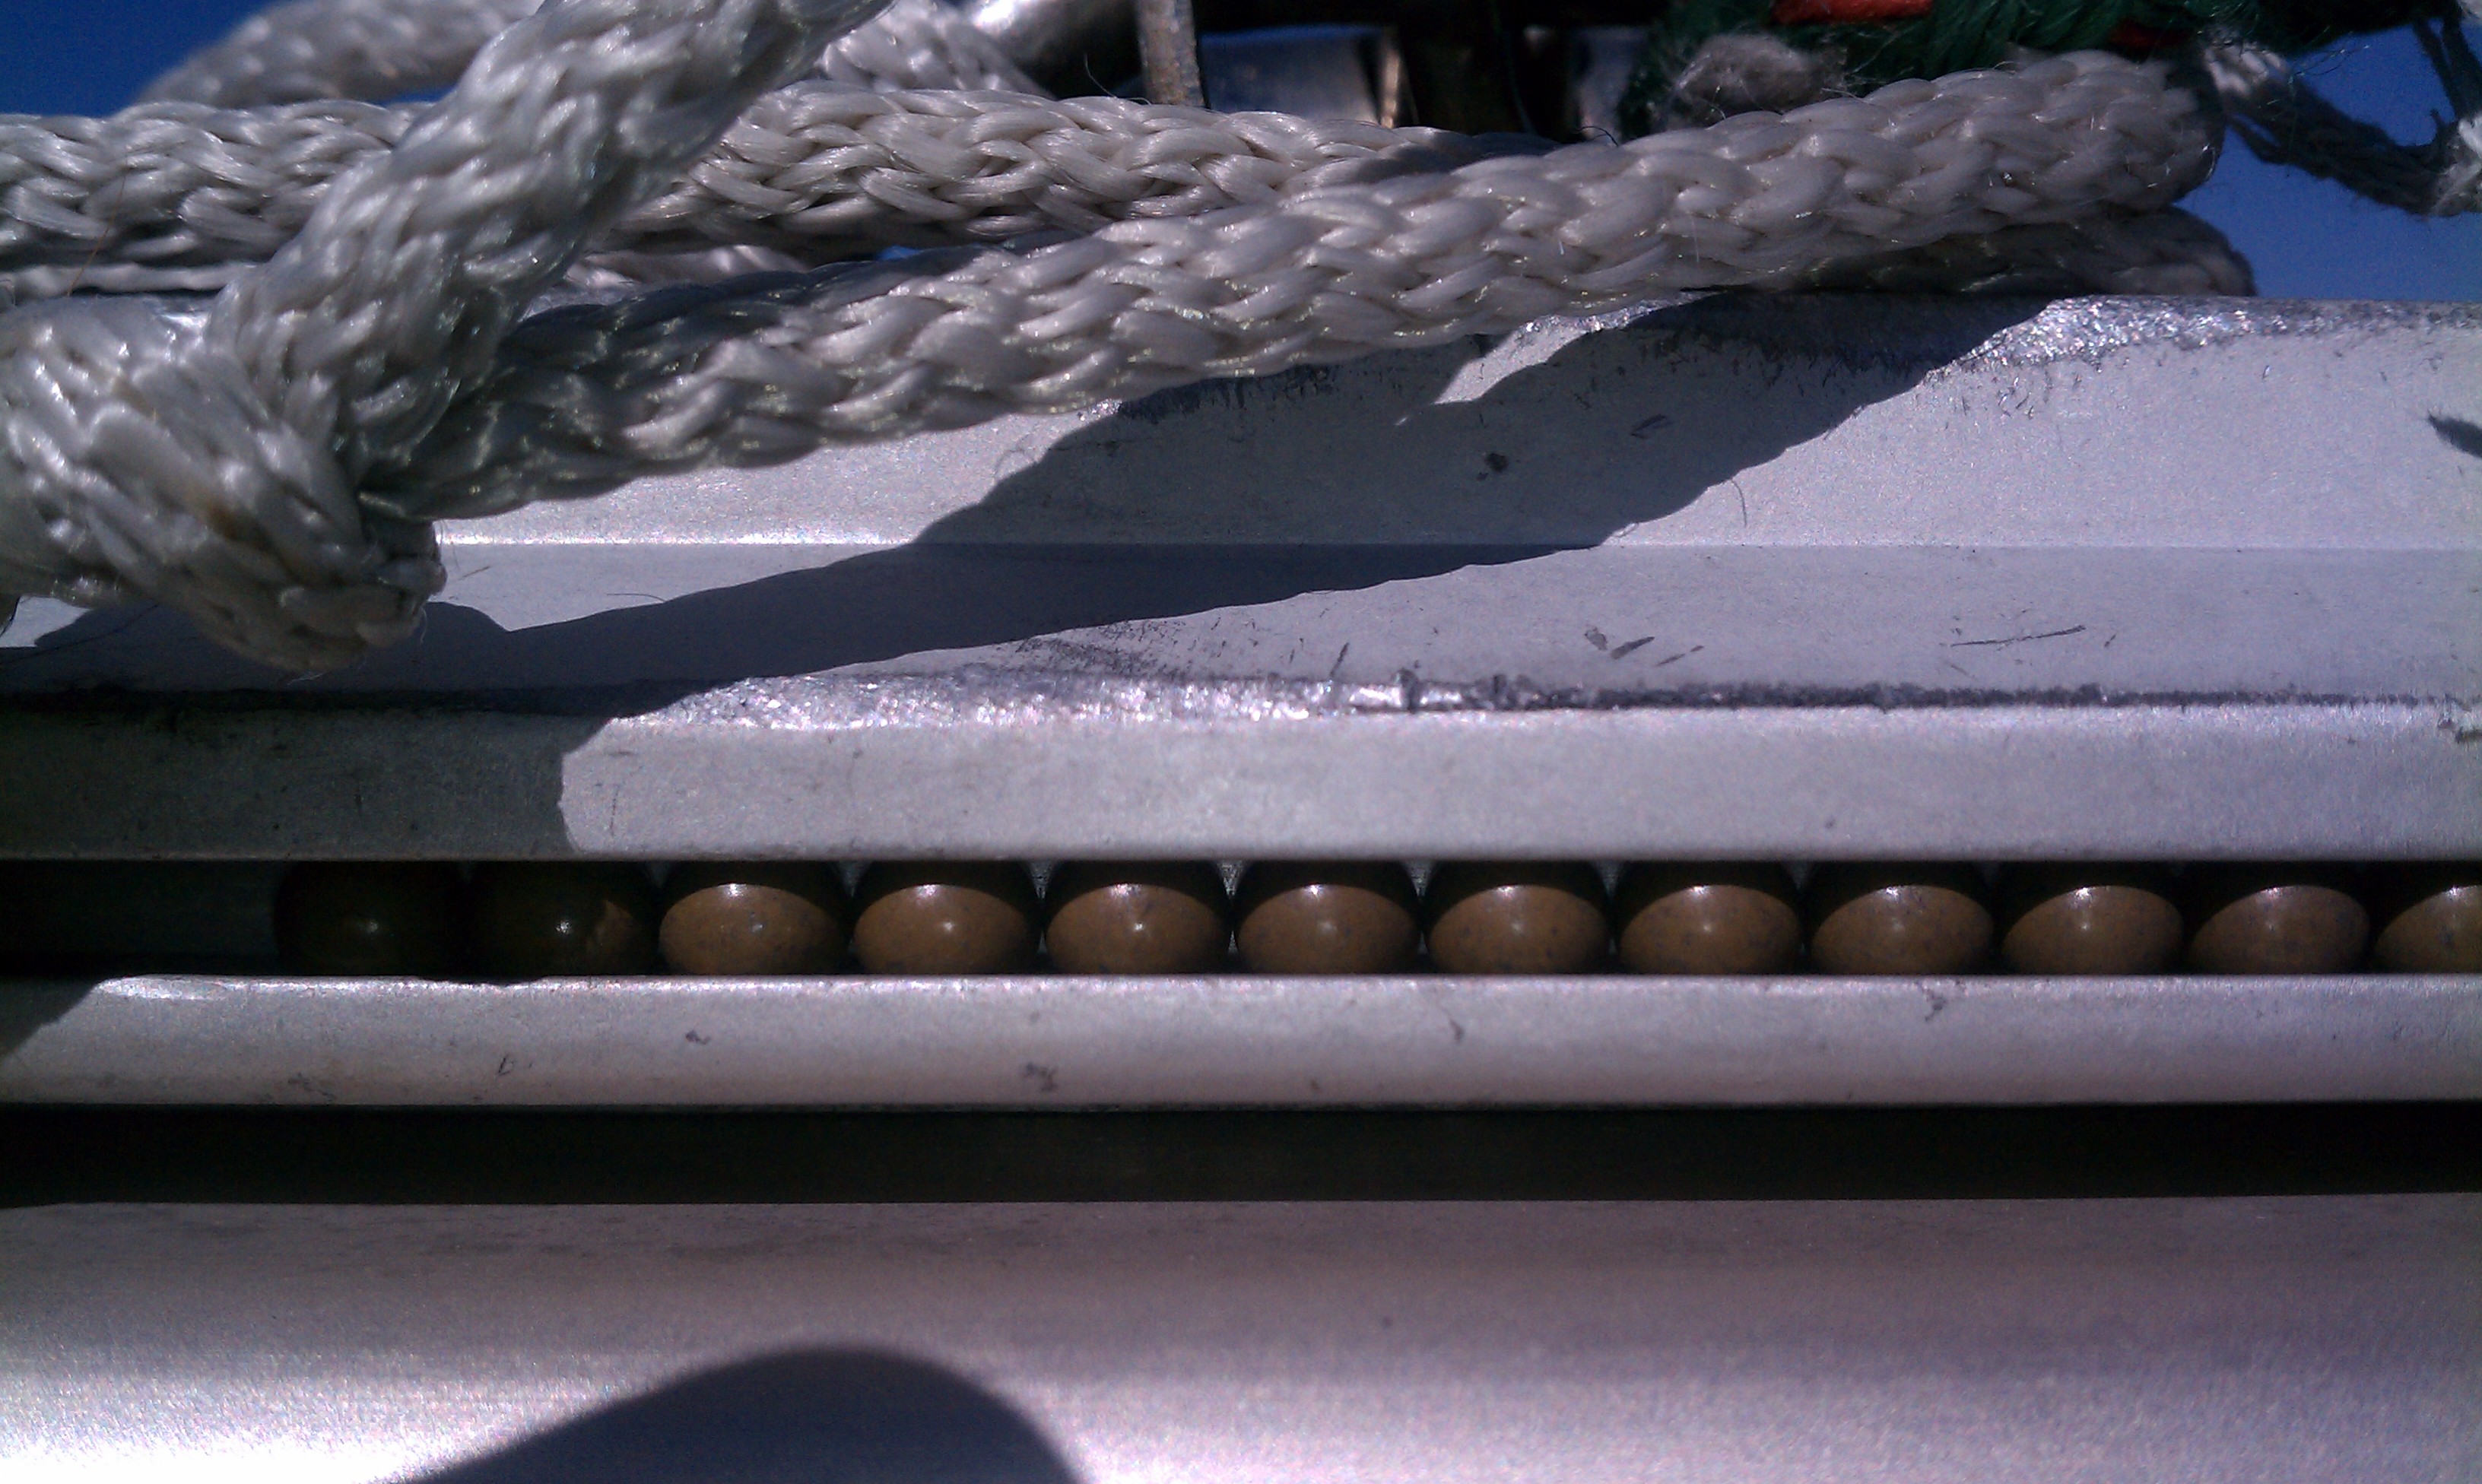
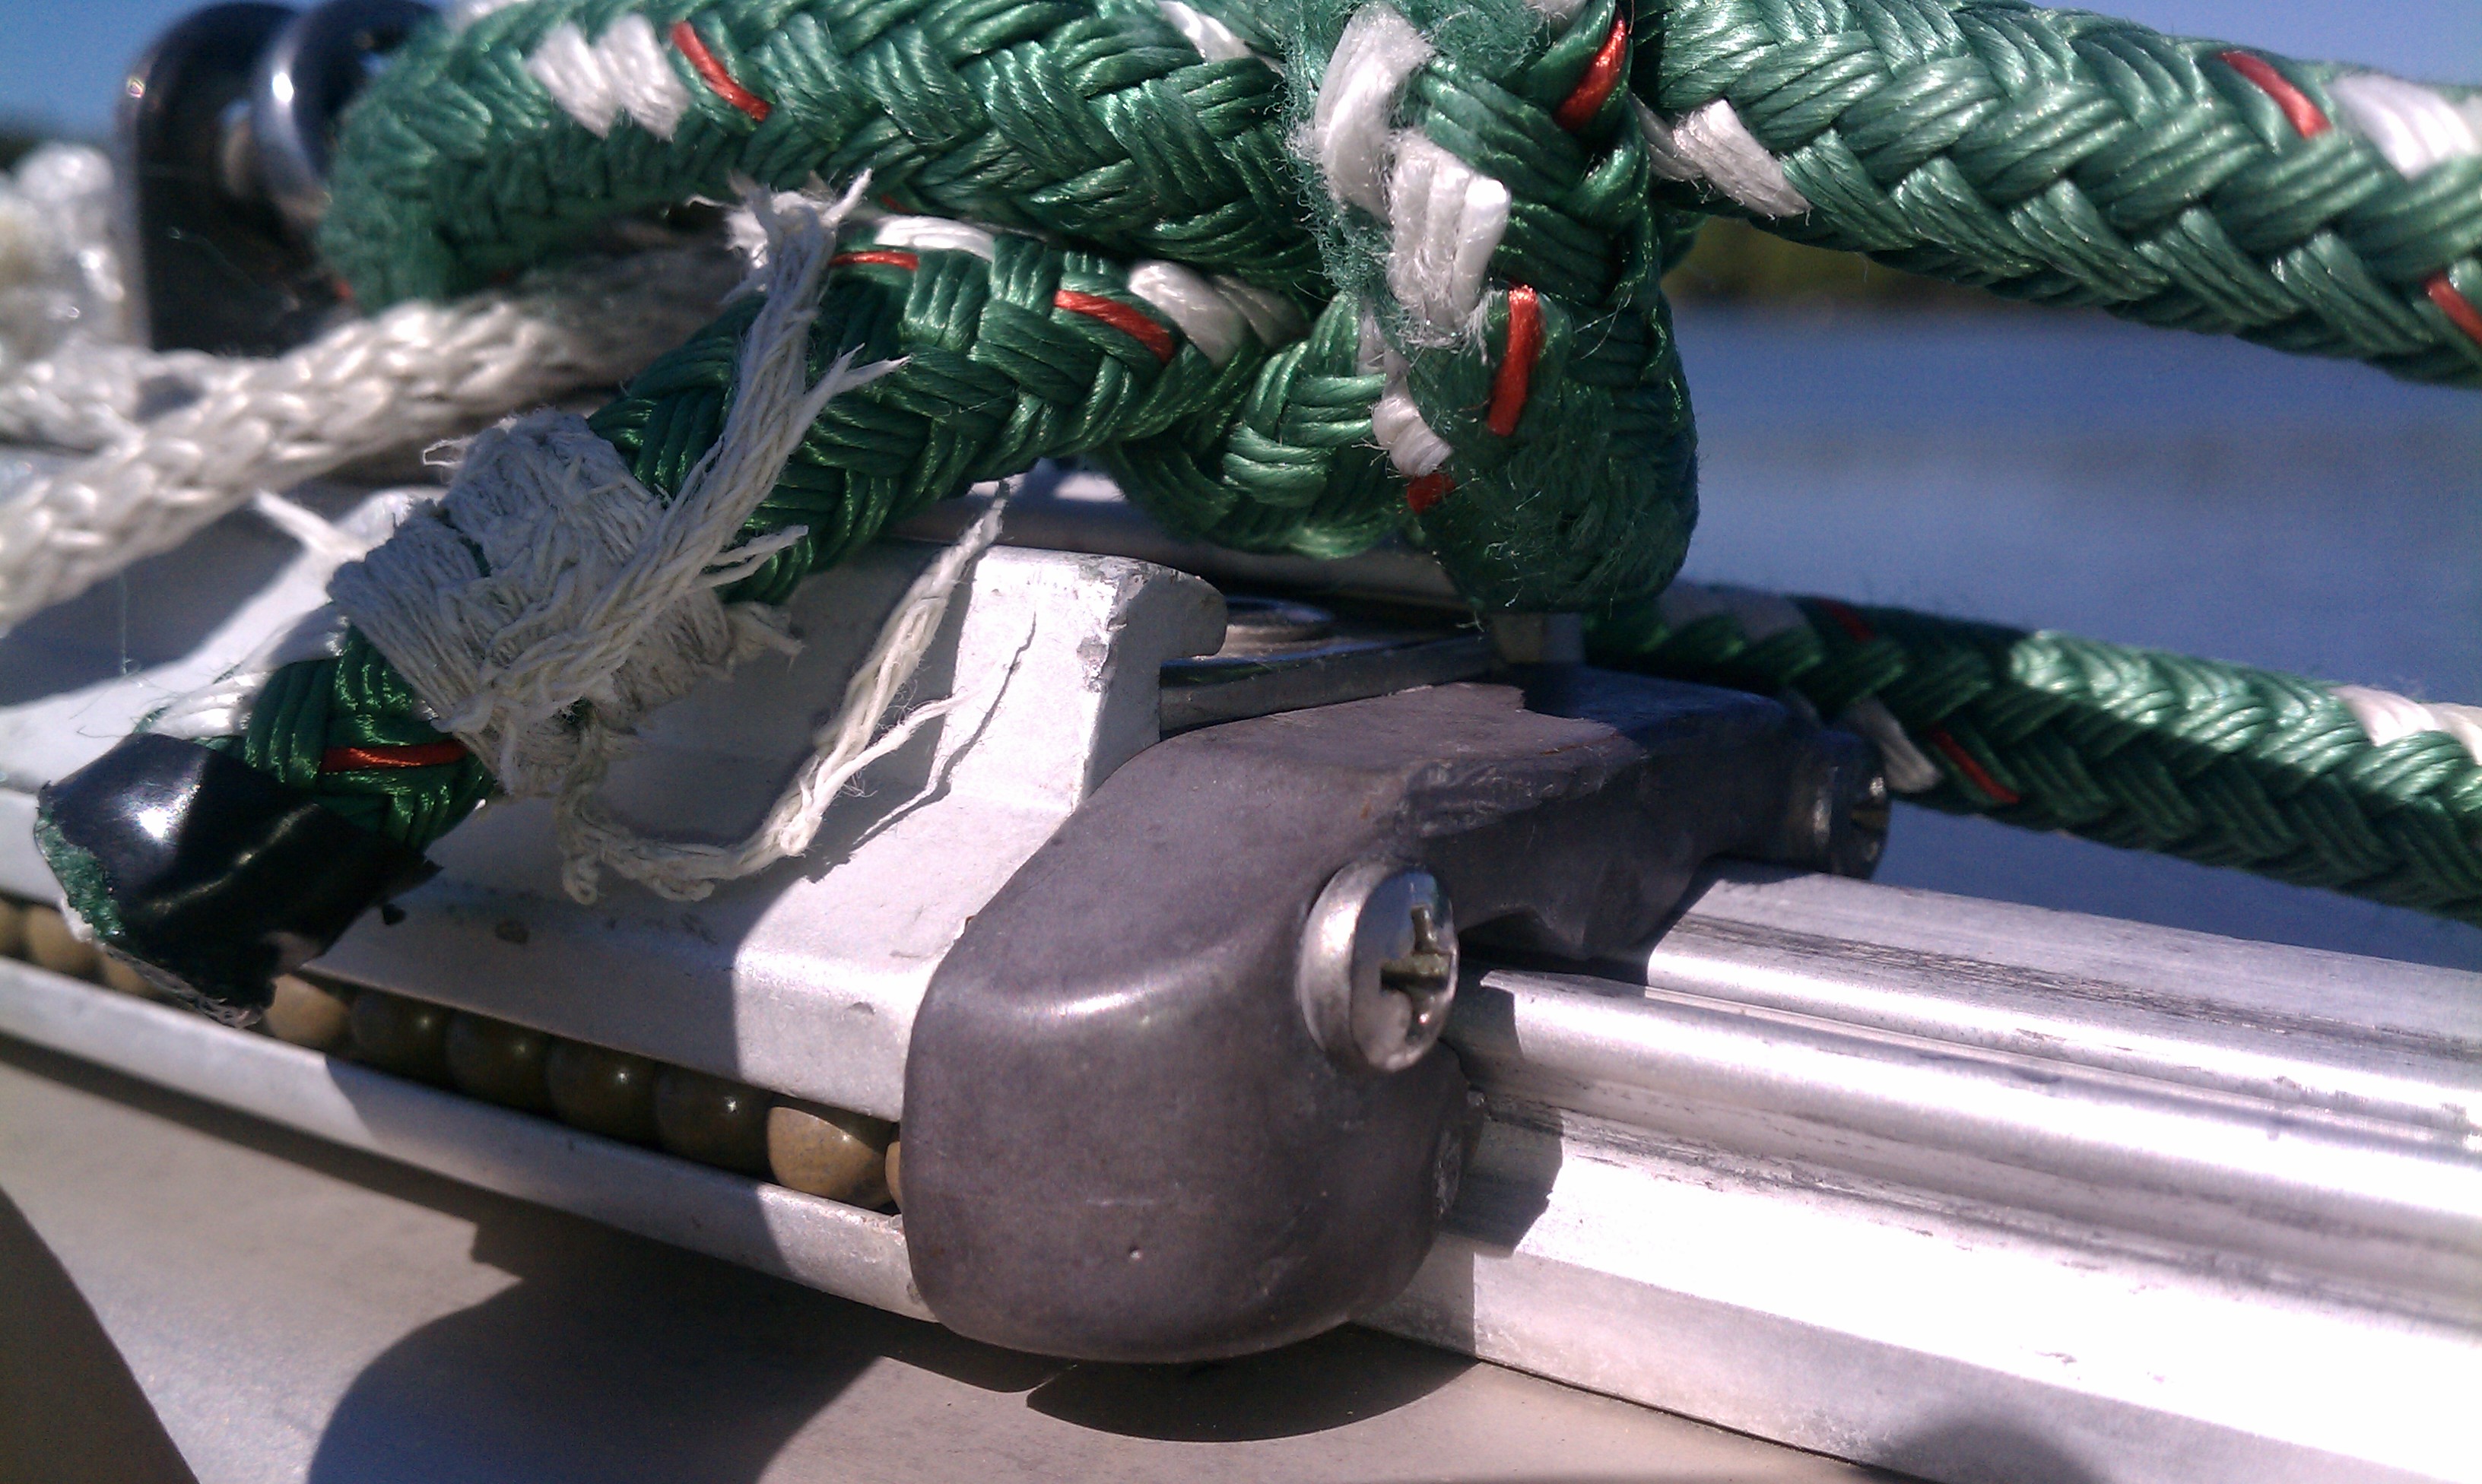
I am looking for help identifying my 1998 Catalina/Morgan Center cockpit in mast furling boom outhaul system. My outhaul has lost half its bearings and I am trying to identify who manufactured my system. I am including pictures, does any one have the same system and know who made it.
The following was published by Catalina, at the end of the article is information provided by Russ Monaco who has done the job. Included are photos on how to brace the window while the adhesive dries.
Remove the old window by first cutting around edge then slowly cutting or prying until the window comes away from deck.
Scrape or sand away all old adhesive/silicone on the deck’s gel-coat, finish with 40 grit sand paper then wipe away all dust.
Do a dry run by positioning the new window in place with the help or masking tape and trace a pencil line onto the brown paper of the inside of the window as it will be installed.
Cut away the one inch or so protective paper on the perimeter of the inside edge of the new window. (Note: maintain paper coating on the outside and inside center to protect it from
You need to be logged in to see the rest of this content. Catalina380-IA members, please login.
To join please fill out a membership application (Association->Membership Application) and send a check to the address on the form.